学习 Build your own React
跟着 https://pomb.us/build-your-own-react/ 尝试实现一个有基本功能的迷你 React。教程内容一流,交互效果更是一流。
作者的仓库:
以及感谢优秀的中译版: https://qcsite.gatsbyjs.io/build-your-own-react/
文章分成8个步骤:
createElement函数render函数- 并发模式
- 纤程 (Fiber)
- 渲染和提交阶段
- 协调 (Reconciliation)
- 函数式组件
- 钩子
1. createElement 函数
首先,我们有一个简单的 React app
const element = (
  <div id="foo">
    <a>bar</a>
    <b />
  </div>
)
const container = document.getElementById("root")
ReactDOM.render(element, container)
首先,我们将它变成 JS:
const element = React.createElement(
  "div",
  { id: "foo" },
  React.createElement("a", null, "bar"),
  React.createElement("b")
)
createElement 函数需要做的就是创建一个带有 type 和 props 的对象。
例如:
createElement("div", null, a, b)
// 返回
{
  "type": "div",
  "props": { "children": [a, b] }
}
因此,函数如下:
const createElement = (type, props, ...children) => {
  return {
    type,
    props: {
      props,
      children,
    },
  };
};
children 数组中也可能有像 strings、numbers 这样的基本值。为了方便起见,我们对所有不是对象的值创建一个特殊类型 TEXT_ELEMENT,这和 React 有所差异。
export const createElement = (type, props, ...children) => {
  return {
    type,
    props: {
      ...props,
      children: children.map((child) =>
        child instanceof Object ? child : createTextElement(child)
      ),
    },
  };
};

const createTextElement = (text) => {
  return {
    type: "TEXT_ELEMENT",
    props: {
      nodeValue: text,
      children: [],
    },
  };
};
2. render 函数
接下来是模拟 ReactDOM.render 函数,首要解决的问题是:怎么往 DOM 里加东西。
首先,创建对应 DOM 节点,然后赋值属性,最后将节点添加到容器。
递归地处理每一个子节点。
export const render = (element, container) => {
  // 根据类型创建 DOM 节点
  const dom =
    element.type === "TEXT_ELEMENT"
      ? document.createTextNode("")
      : document.createElement(element.type);
  // 把 element 里的属性赋给 node
  const isProperty = (key) => key !== "children";
  Object.keys(element.props)
    .filter(isProperty)
    .forEach((name) => {
      dom[name] = element.props[name];
    });
  // 递归执行
  element.props.children.forEach((child) => render(child, dom));
  // 将节点添加到容器
  container.appendChild(dom);
};
相关链接:
Array.prototype.filter() - MDN
Document.createTextNode() - MDN、Node.nodeValue - MDN
至此,我们得到了一个简单的能将 JSX 渲染成 DOM 的库。
可以使用以下代码尝试效果,也可以在 原作者提供的 codesandbox 上尝试。
import * as MyReact from "./MyReact";

/** @jsx MyReact.createElement */
const element = (
  <div style="background: salmon">
    <h1>Hello World! MyReact!</h1>
    <h2 style="text-align:right">Powered by Didact</h2>
  </div>
);
const container = document.getElementById("root");
MyReact.render(element, container);
3. 并发模式
在 render 函数 一节中,我们需要递归地处理子节点。渲染一旦开始就无法停止,可能会阻塞主线程。
因此,我们将任务分成多个小块,每完成一个小块,将控制权交还浏览器,让浏览器判断是否有更高优先级的任务。
我们使用 requestIdleCallback 循环来代替 react/packages/scheduler,回调函数会在浏览器空闲的时候被调用。
let nextUnitOfWork = null;

const workLoop = (deadline) => {
  let shouldYield = false;
  while (nextUnitOfWork && !shouldYield) {
    // 时间充足时执行任务,并返回下一个任务
    nextUnitOfWork = performUnitOfWork(nextUnitOfWork);
    // 判断离浏览器收回控制器的时间是否充足
    shouldYield = deadline.timeRemaining() < 1;
  }
  requestIdleCallback(workLoop);
}

requestIdleCallback(workLoop);4. 纤程(Fiber)
为了组织任务单元,我们需要一个数据结构: Fiber 树。每个 Fiber 节点对应一个 React element。
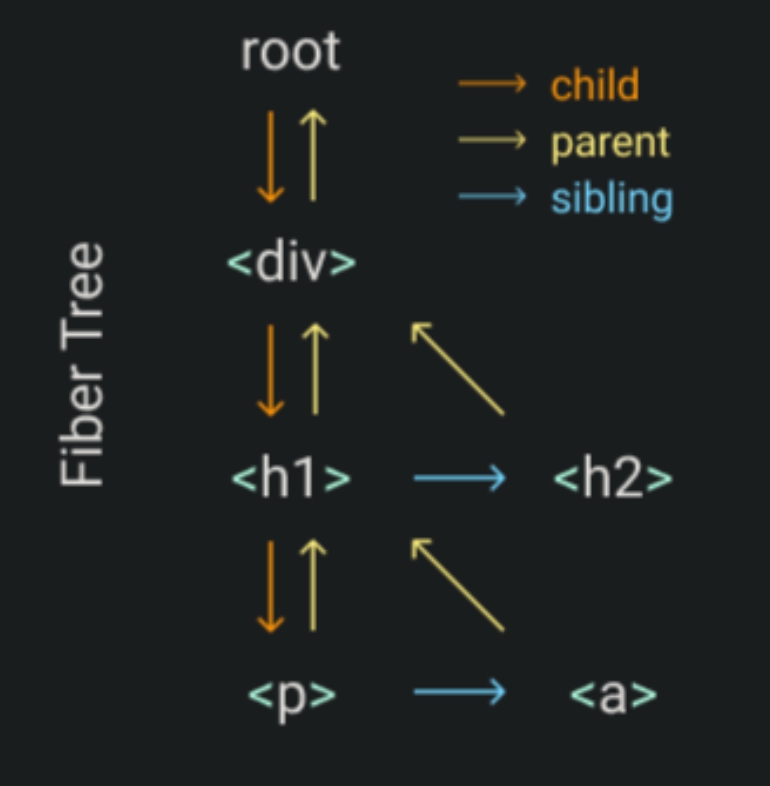
其中,处理顺序是:子节点 -> 兄弟节点 -> 叔节点(父节点的兄弟)
对应的处理函数则是 performUnitOfWork,它需要完成三件事:
- 把 element 添加到 DOM 上;
- 为当前 element 的子节点新建对应 fiber 节点;
- 挑选下一个任务单元
4.1 改进 render
由于原有的 render 函数仅用于插入,因此需要对其进行改进。
首先注释掉旧的 render 函数,并新建一个 render 函数,将 nextUnitOfWork 置为 Fiber 树的根节点。
export const render = (element, container) => {
  // 将 nextUnitOfWork 置为 fiber 树的根节点
  nextUnitOfWork = {
    dom: container,
    props: {
      children: [element],
    },
  };
};
4.2 将节点插入 DOM
首先我们需要创建节点,这里可以复用部分旧的 render 代码。
将旧的 render 改名为 createDom,删除递归执行和插入部分:
const createDom = (fiber) => {
  // 根据类型创建 DOM 节点
  const dom =
    fiber.type === "TEXT_ELEMENT"
      ? document.createTextNode("")
      : document.createElement(fiber.type);
  // 把 fiber 里的属性赋给 node
  const isProperty = (key) => key !== "children";
  Object.keys(fiber.props)
    .filter(isProperty)
    .forEach((name) => {
      dom[name] = fiber.props[name];
    });
  return dom;
};
创建 Fiber 对应的 DOM 节点,并插入到父节点里。
const performUnitOfWork = (fiber) => {
  // 创建节点并插入
  if (!fiber.dom) {
    fiber.dom = createDom(fiber);
  }
  if (fiber.parent) {
    fiber.parent.dom.appendChild(fiber.dom);
  }
  // TODO create new fibers
  // TODO return next unit of work
};
4.3 为子节点创建 Fiber 节点
然后为子节点创建 Fiber 节点并且插入 Fiber 树。
const performUnitOfWork = (fiber) => {
  // 1. 创建节点并插入
  // ...
  // 2. 为 element 子节点创建 Fiber 节点
  const elements = fiber.props.children;
  let prevSibling = null;
  elements.forEach((element, index) => {
    // 新建 Fiber 节点
    const newFiber = {
      type: element.type,
      props: element.props,
      parent: fiber,
      dom: null,
    };
    if (index === 0) {
      // 父节点的 child 指向第一个子节点
      fiber.child = newFiber;
    } else {
      // sibling 指向兄弟节点
      prevSibling.sibling = newFiber;
    }
    prevSibling = newFiber;
  });
  // TODO return next unit of work
};
4.4 选择下一个任务单元
按照 子节点 -> 兄弟节点 -> 叔节点(父节点的兄弟)的顺序选择下一个任务单元
const performUnitOfWork = (fiber) => {
  // 1. 创建节点并插入
  // ...
  // 2. 为 element 子节点创建 Fiber 节点
  // ...
  // 3. 选出下一个任务单元:子 -> 兄弟 -> 叔
  if (fiber.child) {
    return fiber.child;
  }
  let nextFiber = fiber;
  while (nextFiber) {
    if (nextFiber.sibling) {
      return nextFiber.sibling;
    }
    nextFiber = nextFiber.parent;
  }
};
相关链接:
Fiber的结构 - React技术揭秘
5. 渲染和提交阶段
目前,我们的方案会持续生成 DOM 节点并插入到父节点。在完成渲染之前,如果浏览器需要中断这个过程,用户可能会看到渲染不完整的界面。
因此我们在内存中完成修改,所有的任务都完成后再一起添加到 DOM。
我们用一棵叫做 wipRoot(work in progress root)的树来追踪修改。
首先修改 render 函数。在原来的基础上,将 wipRoot 置为 Fiber 树的根节点。
export const render = (element, container) => {
  // 将 nextUnitOfWork 和 wipRoot 置为 fiber 树的根节点
  wipRoot = {
    dom: container,
    props: {
      children: [element],
    },
  };
  nextUnitOfWork = wipRoot;
};

let nextUnitOfWork = null;
// work in progress root,用于追踪修改
let wipRoot = null;
然后,删除 performUnitOfWork 里插入 DOM 节点的部分。
const performUnitOfWork = (fiber) => {
  // 1. 创建节点
  if (!fiber.dom) {
    fiber.dom = createDom(fiber);
  }
  // 2. 为 element 子节点创建 Fiber 节点
  // ...
  // 3. 选出下一个任务单元:子 -> 兄弟 -> 叔
  // ...
};
修改 workLoop,当所有修改已经完成,由 commitRoot 将变化提交到实际 DOM。
const commitRoot = () => {
  // TODO
};

const workLoop = (deadline) => {
  let shouldYield = false;
  while (nextUnitOfWork && !shouldYield) {
    // 时间充足时执行任务,并返回下一个任务
    nextUnitOfWork = performUnitOfWork(nextUnitOfWork);
    // 判断离浏览器收回控制器的时间是否充足
    shouldYield = deadline.timeRemaining() < 1;
  }
  // 判断所有任务已经完成
  if (!nextUnitOfWork && wipRoot) {
    commitRoot();
  }
  requestIdleCallback(workLoop);
};
最后,添加 commitRoot 和 commitWork,递归将节点插入 DOM。
const commitRoot = () => {
  commitWork(fiber);
  wipRoot = null;
};

const commitWork = (fiber) => {
  if (!fiber) {
    return;
  }
  const parentDom = fiber.parent.dom;
  parentDom.appendChild(fiber.dom);
  // 递归添加节点
  commitWork(fiber.child);
  commitWork(fiber.sibling);
};
相关链接:
什么是“双缓存” - React技术揭秘
6. 协调 (Reconciliation)
这一步,需要在之前增加节点的基础上,实现更新和删除。
6.1 保存上次提交
- 新增
currentRoot用来保存上次提交到 DOM 节点的 Fiber 树,并修改commitRoot; - Fiber 节点内增加
alternate,用于记录上一个 commit 阶段使用的 fiber 节点的引用const commitRoot = () => { commitWork(wipRoot.child); currentRoot = wipRoot; wipRoot = null; }; export const render = (element, container) => { // 将 nextUnitOfWork 和 wipRoot 置为 fiber 树的根节点 wipRoot = { dom: container, props: { children: [element], }, // 记录上一个 commit 阶段使用的 fiber 节点的引用 alternate: currentRoot, }; nextUnitOfWork = wipRoot; }; // 上次提交到 DOM 节点的 fiber 树 let currentRoot = null;
6.2 同时迭代
将为子节点创建 Fiber 节点的步骤抽取成 reconcileChildren
const performUnitOfWork = (fiber) => {
  // 1. 创建节点
  // ...
  // 2. 为 element 子节点创建 Fiber 节点
  const elements = fiber.props.children;
  reconcileChildren(fiber, elements);
  // 3. 选出下一个任务单元:子 -> 兄弟 -> 叔
  // ...
};

const reconcileChildren = (wipFiber, elements) => {
  // ...
};
修改循环条件,迭代 elements 的同时也迭代 oldFiber
const reconcileChildren = (wipFiber, elements) => {
  let index = 0;
  // 任一是 undefined 时返回 undefined,都存在时返回后者
  let oldFiber = wipFiber.alternate && wipFiber.alternate.child;
  let prevSibling = null;
  // 同时迭代 elements 和 oldFiber
  while (index < elements.length || oldFiber != null) {
    const element = elements[index];
    // 新建 Fiber 节点
    const newFiber = {
      type: element.type,
      props: element.props,
      parent: wipFiber,
      dom: null,
    };
    if (oldFiber) {
      oldFiber = oldFiber.sibling;
    }
    if (index === 0) {
      // 父节点的 child 指向第一个子节点
      wipFiber.child = newFiber;
    } else {
      // sibling 指向兄弟节点
      prevSibling.sibling = newFiber;
    }
    index++;
    prevSibling = newFiber;
  }
};
6.3 比较区别
通过比较 React element 和上一次提交的 Fiber node 我们可以找到需要在 DOM 上进行哪些改动。
比较的方法:
- 旧的 Fiber 和新的 React element 类型相同,则复用节点,仅修改属性
- 类型不同且有新的 element,需要增加 DOM 节点
- 类型不同且有旧 Fiber,需要删除 DOM 节点
分类设计 newFiber
const reconcileChildren = (wipFiber, elements) => {
  let index = 0;
  // 任一是 undefined 时返回 undefined,都存在时返回后者
  let oldFiber = wipFiber.alternate && wipFiber.alternate.child;
  let prevSibling = null;
  // 同时迭代 elements 和 oldFiber
  while (index < elements.length || oldFiber != null) {
    const element = elements[index];
    let newFiber = null;
    const sameType = element && oldFiber && element.type === oldFiber.type;
    if (sameType) {
      // 类型相同,复用
    }
    if (element && !sameType) {
      // 需要新增
    }
    if (oldFiber && !sameType) {
      // 需要删除
    }
    if (index === 0) {
      // 父节点的 child 指向第一个子节点
      wipFiber.child = newFiber;
    } else {
      // sibling 指向兄弟节点
      prevSibling.sibling = newFiber;
    }
    index++;
    prevSibling = newFiber;
  }
};
后面针对各种情况继续修改 reconcileChildren。
6.3.1 复用
复用旧的 DOM 节点,仅将 React element 的属性置换进去。effectTag 设置为 "UPDATE",后面会用到。
if (element && !sameType) {
  // 需要新增
  newFiber = {
    type: element.type,
    props: element.props,
    dom: null,
    parent: wipFiber,
    alternate: null,
    effectTag: "PLACEMENT",
  };
}
6.3.2 新增
effectTag 设置为 "PLACEMENT"
if (element && !sameType) {
  // 需要新增
  newFiber = {
    type: element.type,
    props: element.type,
    dom: null,
    parent: wipFiber,
    alternate: null,
    effectTag: "PLACEMENT",
  };
}
6.3.3 删除
删除时,不需要创建新 Fiber 节点,因此没有 newFiber,就只修改旧节点的 effectTag。同时由于我们 commit 的时候,并不会再遍历旧的 Fiber 树,所以需要使用一个数组标记哪些节点被删除。
新建数组
let nextUnitOfWork = null;
// 上次提交到 DOM 节点的 fiber 树
let currentRoot = null;
// work in progress root,用于追踪修改
let wipRoot = null;
// 需要删除的 DOM 节点
let deletions = null;
修改 reconcileChildren
if (oldFiber && !sameType) {
  // 需要删除
  oldFiber.effectTag = "DELETION";
  deletions.push(oldFiber);
}
同时,由于删除不产生新的 fiber,所以需要修改连接兄弟的条件
if (index === 0) {
  // 父节点的 child 指向第一个子节点
  wipFiber.child = newFiber;
  // 原来是 else
} else if (element) {
  // sibling 指向兄弟节点
  prevSibling.sibling = newFiber;
}
修改 render
export const render = (element, container) => {
  // 将 nextUnitOfWork 和 wipRoot 置为 fiber 树的根节点
  wipRoot = {
    // ...
  };
  nextUnitOfWork = wipRoot;
  // 初始化储存需要删除的 DOM 节点的数组
  deletions = [];
};
修改 commitRoot,提交需要删除的节点
const commitRoot = () => {
  // 需要删除的节点也需要提交
  deletions.forEach(commitWork);
  commitWork(wipRoot.child);
  currentRoot = wipRoot;
  wipRoot = null;
};
6.4 处理 effectTag
我们需要对 commitWork 进行修改,以处理各种条件下 DOM 的变化。
遇到 PLACEMENT 和 DELETION 的情况比较简单,直接插入或删除即可。
const commitWork = (fiber) => {
  if (!fiber) {
    return;
  }
  const parentDom = fiber.parent.dom;
  if (fiber.effectTag === "PLACEMENT" && fiber.dom != null) {
    // 需要增加
    parentDom.appendChild(fiber.dom);
  } else if (fiber.effectTag === "UPDATE" && fiber.dom != null) {
    // 需要复用
  } else if (fiber.effectTag === "DELETION") {
    // 需要删除
    parentDom.removeChild(fiber.dom);
  }
  // parentDom.appendChild(fiber.dom);
  // 递归添加节点
  commitWork(fiber.child);
  commitWork(fiber.sibling);
};
下面考虑复用情况:
新建 updateDom 函数用于属性的新增和更新
const updateDom = (dom, prevProps, nextProps) => {
  const isProperty = (key) => key !== "children";
  const isNew = (prev, next) => (key) => prev[key] !== next[key];
  const isGone = (prev, next) => (key) => !(key in next);
  // 移除旧属性
  Object.keys(prevProps)
    .filter(isProperty)
    .filter(isGone(prevProps, nextProps))
    .forEach((name) => {
      dom[name] = "";
    });
  // 新增或更新属性
  Object.keys(nextProps)
    .filter(isProperty)
    .filter(isNew(prevProps, nextProps))
    .forEach((name) => {
      dom[name] = nextProps[name];
    });
};
修改 commitWork
else if (fiber.effectTag === "UPDATE" && fiber.dom != null) {
    // 需要复用
    updateDom(fiber.dom, fiber.alternate.props, fiber.props);
  }
同时,发现这个函数也可以用在 createDom
const createDom = (fiber) => {
  // 根据类型创建 DOM 节点
  const dom =
    fiber.type === "TEXT_ELEMENT"
      ? document.createTextNode("")
      : document.createElement(fiber.type);
  // 把 fiber 里的属性赋给 node
  updateDom(dom, {}, fiber.props);
  return dom;
};
6.5 处理事件监听
在 updateDom 中,当我们遇到事件监听时,需要特殊处理。
const updateDom = (dom, prevProps, nextProps) => {
  // 判断是否时事件监听 (on 开头)
  const isEvent = (key) => key.startsWith("on");
  const isProperty = (key) => key !== "children" && !isEvent(key);
  const isNew = (prev, next) => (key) => prev[key] !== next[key];
  const isGone = (prev, next) => (key) => !(key in next);
  // 移除旧的和发生改变的事件监听
  Object.keys(prevProps)
    .filter(isEvent)
    .filter(
      // 旧的和改变的都要移除
      (key) =>
        isGone(prevProps, nextProps)(key) || isNew(prevProps, nextProps)(key)
    )
    .forEach((name) => {
      // 得到事件类型:onClick => click
      const eventType = name.toLowerCase().substring(2);
      dom.removeEventListener(eventType, prevProps[name]);
    });
  // 移除旧属性
  // ...
  // 新增或更新属性
  // ...
  // 新增事件监听
  Object.keys(nextProps)
    .filter(isEvent)
    .filter(isNew(prevProps, nextProps))
    .forEach((name) => {
      const eventType = name.toLowerCase().substring(2);
      dom.addEventListener(eventType, nextProps[name]);
    });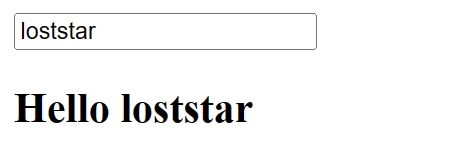
};至此,我们完成了增删改功能。可以使用以下代码或者在原作者提供的 codesandbox尝试。
/** @jsx MyReact.createElement */
const container = document.getElementById("root");

const updateValue = (e) => {
  rerender(e.target.value);
};

const rerender = (value) => {
  const element = (
    <div>
      <input onInput={updateValue} value={value} />
      <h2>Hello {value}</h2>
    </div>
  );
  MyReact.render(element, container);
};

rerender("World");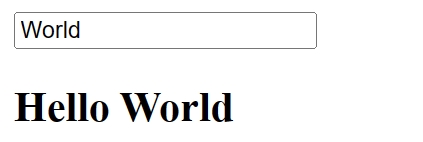
7. 函数式组件
下面是支持函数式组件。当遇到函数式组件时,jsx 转换成 js 的情况如下:
// jsx
function App(props) {
  return <h1>Hi {props.name}</h1>
}
const element = <App name="foo" />
// js
function App(props) {
  return MyReact.createElement(
    "h1",
    null,
    "Hi ",
    props.name
  )
}
const element = MyReact.createElement(App, {
  name: "foo",
})
函数式组件有以下两个不同点:
- 函数式组件的 Fiber 没有 DOM 节点
- 子节点来自函数的运行而不是直接从
props读取。
因此,当 Fiber 的类型是函数的时候,需要分类处理。
关键就是如何获得子节点。参考上面的例子,我们可以发现,运行函数即可。
const performUnitOfWork = (fiber) => {
  // 判断是否为函数式组件
  const isFunctionComponent = fiber.type instanceof Function;
  // 为 element 子节点创建 Fiber 节点
  if (isFunctionComponent) {
    updateFunctionComponent(fiber);
  } else {
    updateHostComponent(fiber);
  }
  // 选出下一个任务单元:子 -> 兄弟 -> 叔
  if (fiber.child) {
    return fiber.child;
  }
  let nextFiber = fiber;
  while (nextFiber) {
    if (nextFiber.sibling) {
      return nextFiber.sibling;
    }
    nextFiber = nextFiber.parent;
  }
};

const updateFunctionComponent = (fiber) => {
  // 函数式组件不能从 props 读子组件
  const children = [fiber.type(fiber.props)];
  reconcileChildren(fiber, children);
};

const updateHostComponent = (fiber) => {
  // 1. 创建节点
  if (!fiber.dom) {
    fiber.dom = createDom(fiber);
  }
  // 2. 为 element 子节点创建 Fiber 节点
  const elements = fiber.props.children;
  reconcileChildren(fiber, elements);
};
同时,由于函数式组件没有 DOM 节点,所以在寻找父子节点的时候,需要跳过并找到离它最近的上(下)一个节点。
修改 commitWork,增加 commitDeletion
const commitWork = (fiber) => {
  if (!fiber) {
    return;
  }
  let domParentFiber = fiber.parent;
  // 找父节点,需要跳过函数式组件,找到上面第一个有 DOM 节点的
  while (!domParentFiber.dom) {
    domParentFiber = domParentFiber.parent;
  }
  const domParent = domParentFiber.dom;
  if (fiber.effectTag === "PLACEMENT" && fiber.dom != null) {
    // 需要增加
    domParent.appendChild(fiber.dom);
  } else if (fiber.effectTag === "UPDATE" && fiber.dom != null) {
    // 需要复用
    updateDom(fiber.dom, fiber.alternate.props, fiber.props);
  } else if (fiber.effectTag === "DELETION") {
    // 需要删除
    commitDeletion(fiber, domParent);
  }
  // 递归添加节点
  commitWork(fiber.child);
  commitWork(fiber.sibling);
};

const commitDeletion = (fiber, domParent) => {
  // 函数式组件没有 DOM 节点,需要找到 fiber 下第一个有 DOM 节点的
  if (fiber.dom) {
    domParent.removeChild(fiber.dom);
  } else {
    commitDeletion(fiber.child, domParent);
  }
};
8. 钩子 (Hooks)
首先加入一些全局变量,以及在 Fiber 中加入 hook 数组。
let wipFiber = null;
let hookIndex = null;

const updateFunctionComponent = (fiber) => {
  wipFiber = fiber;
  hookIndex = 0;
  // 支持同一组件多次使用 useState
  wipFiber.hooks = [];
  // 函数式组件不能从 props 读子组件
  const children = [fiber.type(fiber.props)];
  reconcileChildren(fiber, children);
};
下一步是实现 useState 函数。
export const useState = (initial) => {
  // 判断是否存在旧的 hook,存在则取出旧值
  const oldHook =
    wipFiber.alternate &&
    wipFiber.alternate.hooks &&
    wipFiber.alternate.hooks[hookIndex];
  // 旧 hook 存在则复制一份,不存在则初始化
  const hook = { state: oldHook ? oldHook.state : initial };
  // 将 hook 放入 Fiber
  wipFiber.hooks.push(hook);
  hookIndex++;
  return [hook.state];
};
下一步就是实现 setState。
export const useState = (initial) => {
  // 判断是否存在旧的 hook,存在则取出旧值
  const oldHook =
    wipFiber.alternate &&
    wipFiber.alternate.hooks &&
    wipFiber.alternate.hooks[hookIndex];
  // 旧 hook 存在则复制一份,不存在则初始化
  const hook = {
    state: oldHook ? oldHook.state : initial,
    // 存放 setState 的 action
    queue: [],
  };
  const setState = (action) => {
    hook.queue.push(action);
    // 设置 wipRoot 以及 nextUnitOfWork,workLoop 被2调用时会开启新一轮的渲染
    wipRoot = {
      dom: currentRoot.dom,
      props: currentRoot.props,
      alternate: currentRoot,
    };
    nextUnitOfWork = wipRoot;
    deletions = [];
  };
  // 将 hook 放入 Fiber
  wipFiber.hooks.push(hook);
  hookIndex++;
  return [hook.state, setState];
};
最后,执行 actions,更新状态。
export const useState = (initial) => {
// 判断是否存在旧的 hook,存在则取出旧值
const oldHook =
wipFiber.alternate &&
wipFiber.alternate.hooks &&
wipFiber.alternate.hooks[hookIndex];
// 旧 hook 存在则复制一份,不存在则初始化
const hook = {
state: oldHook ? oldHook.state : initial,
// 存放 setState 的 action
queue: [],
};
// 执行 setState 里的 action
const actions = oldHook ? oldHook.queue : [];
actions.forEach((action) => {
hook.state = action(hook.state);
});
const setState = (action) => {
hook.queue.push(action);
// 设置 wipRoot 以及 nextUnitOfWork,workLoop 被2调用时会开启新一轮的渲染
wipRoot = {
dom: currentRoot.dom,
props: currentRoot.props,
alternate: currentRoot,
};
nextUnitOfWork = wipRoot;
deletions = [];
};
// 将 hook 放入 Fiber
wipFiber.hooks.push(hook);
hookIndex++;
return [hook.state, setState];
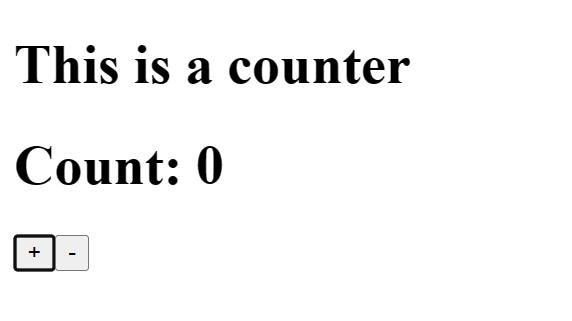
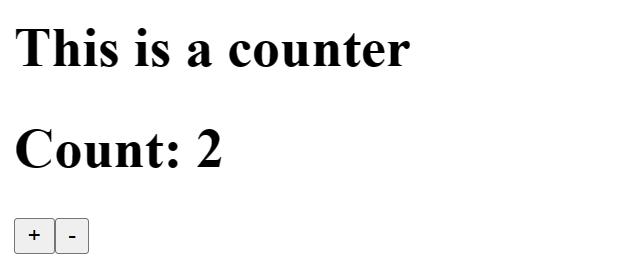
};最终,我们构建了属于我们自己的 React。可以使用以下代码或者在原作者提供的 codesandbox尝试。
import * as MyReact from "./MyReact";

/** @jsx MyReact.createElement */
const Counter = () => {
  const [state, setState] = MyReact.useState(0);
  return (
    <div>
      <h1>Count: {state}</h1>
      <button onClick={() => setState((c) => c + 1)}>+</button>
      <button onClick={() => setState((c) => c - 1)}>-</button>
    </div>
  );
};
const App = () => {
  return (
    <div>
      <h1>This is a counter</h1>
      <Counter />
    </div>
  );
};
const container = document.getElementById("root");
MyReact.render(<App />, container);